Are you tired of searching for the perfect tool chest that fits your needs and budget? Look no further than plywood tool chest plans. With a little bit of effort and creativity, you can build your own customized tool chest that is both durable and cost-effective. In this article, we will guide you through the process of building a plywood tool chest, complete with all the necessary information, tips, and tricks.
Why Choose Plywood for Your Tool Chest?
One of the primary reasons to choose plywood for your tool chest is its durability. Plywood is made by gluing together several layers of wood veneer, which makes it stronger and more resistant to cracking or warping than solid wood. Additionally, plywood has excellent dimensional stability, meaning it won’t expand or contract due to humidity changes.
Another benefit of using plywood is its cost-effectiveness. Compared to other materials like solid wood or metal, plywood is relatively inexpensive. This makes it an ideal choice for DIY enthusiasts who want to build their own storage solutions without breaking the bank.
Tools and Materials Needed
Before you start building your plywood tool chest, you’ll need to gather some tools and materials. Here’s what you’ll need:
– 3/4 inch thick plywood sheet
– Circular saw or table saw
– Jigsaw
– Drill
– Screws (1 1/4 inch)
– Wood glue
– Sandpaper
– Tape measure
– Pencil
– Ruler
– Clamps
Step-by-step Guide to Building Your Plywood Tool Chest
Now that you have all the necessary tools and materials let’s get started on building your plywood tool chest. Follow these steps carefully, and you’ll have a sturdy and functional storage solution in no time.
Step 1: Cut the pieces
Using a circular saw or table saw, cut the plywood sheet into the following pieces:
– Top and bottom panels (2): 24 x 16 inches
– Side panels (2): 24 x 12 inches
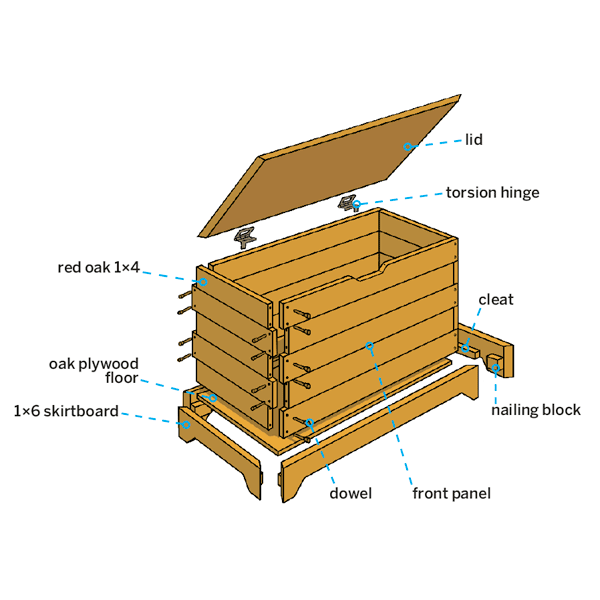
– Front panel (1): 16 x 12 inches
– Back panel (1): 24 x 12 inches
Step 2: Cut the notches
Using a jigsaw, cut out notches on both sides of the front panel that will serve as handles. The notches should be about three inches wide and one inch deep.
Step 3: Assemble the sides
Use wood glue to attach the side panels to the top and bottom panels. Make sure they are flush with each other and use clamps to hold them in place while the glue dries. Once dry, drill pilot holes and screw them together using screws.
Step 4: Attach the front and back panels
Attach the front panel by gluing it to the sides and bottom panel. Use clamps to hold it in place while you drill pilot holes and screw it together. Repeat this process for the back panel.
Step 5: Sand and finish
Sand all surfaces of your plywood tool chest until they are smooth. You can also apply a coat of paint or varnish to give it a polished look.
Optional Steps
If you want to customize your plywood tool chest, here are some optional steps you can take:
– Add dividers inside the chest by cutting additional pieces of plywood and attaching them with wood glue.
– Install casters on the bottom of your tool chest for easy mobility.
– Apply foam padding or felt lining inside your chest to protect your tools from scratches.
Conclusion
Building your own plywood tool chest is a great way to save money while creating a customized storage solution that fits your needs perfectly. With our step-by-step guide, you can easily build a durable and cost-effective tool chest that will last for years to come. So, why wait? Grab your tools and get started on building your own plywood tool chest today!
References:
– “Plywood.” Wikipedia, Wikimedia Foundation, 11 Aug. 2021, en.wikipedia.org/wiki/Plywood.
– “DIY Tool Chest.” Instructables, Autodesk, Inc., www.instructables.com/DIY-Tool-Chest/.


