Are you a music producer or engineer who uses Pro Tools for mixing and mastering? Do you struggle with exporting stems from your projects? Look no further! In this article, we will guide you through the process of exporting stems in Pro Tools.
[h2]What are Stems?[/h2]
Before we dive into exporting stems, let’s define what they are. Stems are submixes of individual tracks that make up a full mix. For example, if you have a project with drums, bass, guitar, and vocals, you can create stems for each instrument. This allows for easier mixing and editing in other software or for collaboration purposes.
[h2]Why Export Stems?[/h2]
Exporting stems has many benefits. It allows for flexibility in the mixing process as well as compatibility with other software. By exporting stems, you can collaborate with others who may not have access to Pro Tools, which is essential for remote work. Additionally, it enables easy remixing and mastering down the line.
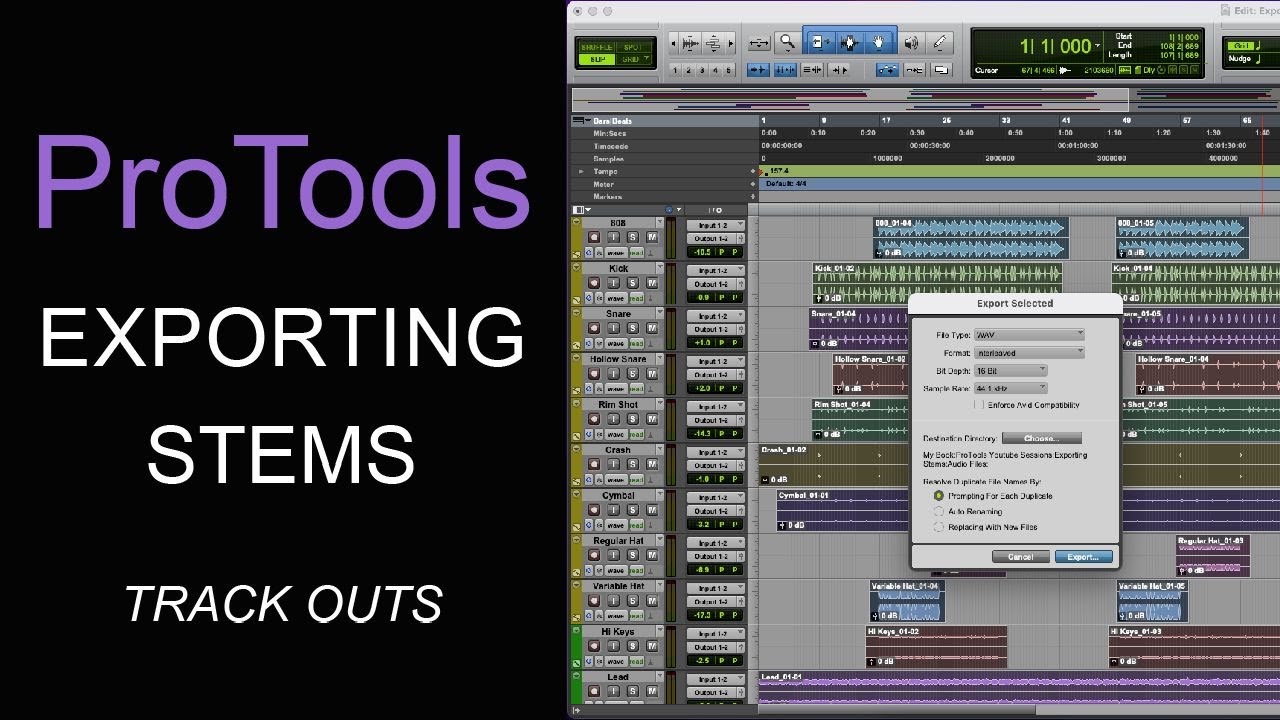
[h2]How to Export Stems in Pro Tools[/h2]
Now that we understand what stems are and why we should export them let’s get into how to do it in Pro Tools.
1. Organize your project: Before exporting stems, organize your project by grouping tracks together based on their function (drums, bass, etc.). This will make it easier to export them as separate files.
2. Create submixes: Once your tracks are grouped together, create submixes by routing them to new channels. To do this, select the tracks you want to group together and route them to a new channel using the ‘Sends’ option on each track.
3. Rename the submixes: Rename each submix according to its contents (e.g., Drums, Bass, Guitar, Vocals).
4. Mute unnecessary tracks: Mute any tracks that are not included in the submixes to avoid exporting unwanted audio.
5. Solo and Export: Solo each submix and export it as a separate file using the ‘Export Selected as Files’ option under the File menu. Make sure to select the appropriate settings for your desired file format and quality.
6. Repeat for all submixes: Repeat steps 4-5 for each submix until you have exported all necessary stems.
[h2]Tips for Exporting Stems[/h2]
Here are some additional tips to keep in mind when exporting stems in Pro Tools:
– Check your settings: Double-check your export settings before exporting to ensure you’re getting the desired quality and format.
– Use consistent naming conventions: Use consistent naming conventions for your files to make them easier to identify later on.
– Include a reference mix: Include a reference mix with your exported stems so collaborators can hear what the final mix should sound like.
– Save a copy of your project: Save a copy of your original project before exporting stems in case you need to make changes down the line.
[h2]Conclusion[/h2]
Exporting stems is an essential part of the music production process, especially when collaborating with others or working remotely. By following the steps outlined in this guide, you can easily export stems from Pro Tools while maintaining high-quality audio. Remember to organize your project, create submixes, and double-check your settings before exporting. With these tips in mind, you’ll be able to export stems like a pro!
References:
– “Stems (audio)” Wikipedia, The Free Encyclopedia. Wikimedia Foundation, Inc. Accessed 14 June 2021. https://en.wikipedia.org/wiki/Stems_(audio)