Granite Polish Tools: How to Achieve a Perfectly Polished Countertop
Granite is one of the most popular materials for kitchen countertops due to its durability and timeless beauty. However, even the most stunning granite can lose its luster over time due to daily wear and tear. Fortunately, with the right tools and techniques, you can restore your granite countertop’s shine and keep it looking like new for years to come.
In this article, we’ll explore the best granite polish tools on the market and provide step-by-step instructions on how to use them effectively. Whether you’re a homeowner looking to DIY your granite polishing project or a professional contractor seeking top-quality tools, this guide has everything you need to achieve a perfectly polished countertop.
Why You Need Granite Polish Tools
Before we dive into the specific tools you’ll need for granite polishing, let’s first discuss why they’re necessary in the first place. Granite is a porous material that can absorb liquids and stains if left untreated. Over time, these stains can dull the surface of your countertop and make it appear dingy or discolored.
Furthermore, everyday wear and tear from cooking, cleaning, and other activities can cause scratches and scuffs on your countertop’s surface. These imperfections not only detract from your granite’s appearance but also make it more difficult to clean and maintain.
That’s where granite polish tools come in. By using specialized polishes, sealants, and equipment designed specifically for granite surfaces, you can restore your countertop’s shine and protect it from future damage.
Top Granite Polish Tools
Now that you understand why granite polish tools are essential let’s take a closer look at some of the top products on the market today:
1. Diamond Polishing Pads – These pads are made with industrial-grade diamonds that help remove scratches and imperfections from your granite surface. They come in varying grits, ranging from coarse to fine, depending on the level of polishing you need to achieve.
2. Granite Polish Solutions – These specialized polishes are formulated to bring out the natural shine and color in your granite countertop. They’re easy to apply and can be used on both polished and unpolished surfaces.
3. Stone Sealer – This product is designed to protect your granite surface from future damage by creating a barrier against stains, liquids, and scratches. It’s essential for keeping your countertop looking like new for years to come.
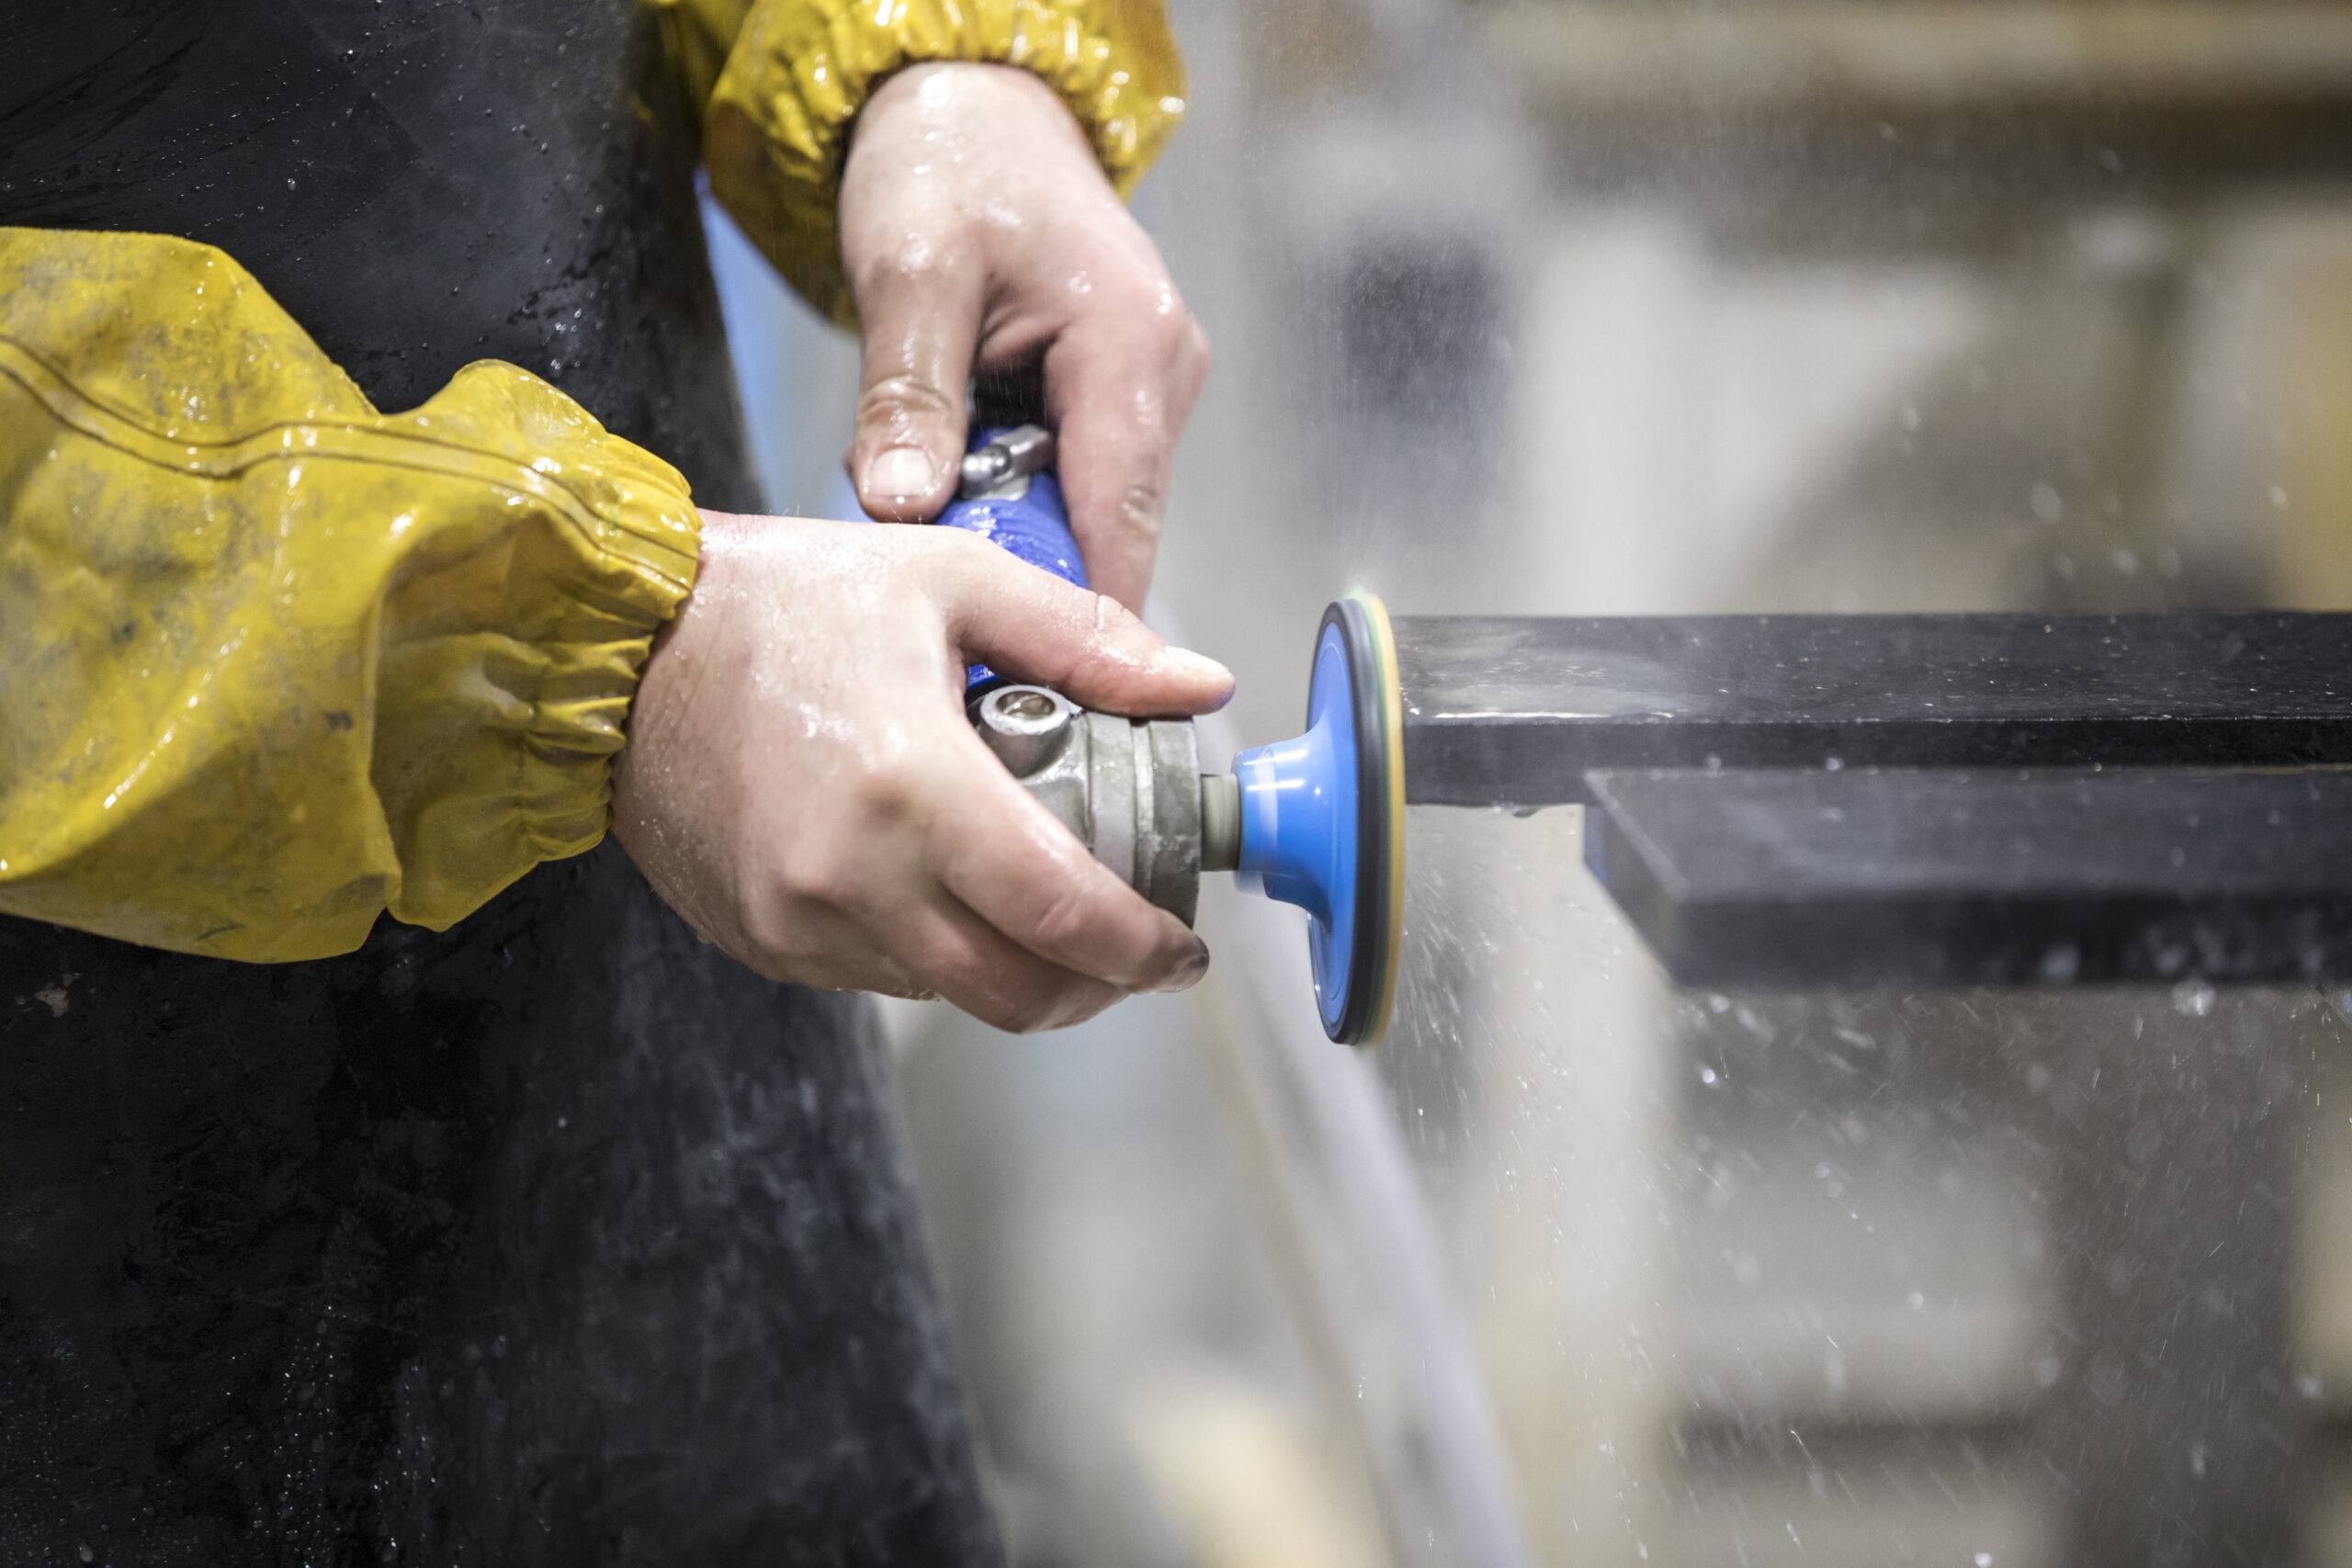
4. Wet Grinder – A wet grinder is an electric tool that uses water to cool and lubricate diamond polishing pads while they’re in use. This helps prevent overheating and extends the life of your polishing pads.
5. Edge Polishing Tools – If you have a lot of edges or corners on your countertop, edge polishing tools can help you achieve a smooth, polished finish in those hard-to-reach areas. These tools come in various shapes and sizes, so make sure you choose one that’s suitable for your specific needs.
How to Use Granite Polish Tools
Now that you know what granite polish tools you need let’s walk through the steps involved in using them effectively:
1. Clean Your Countertop – Before you begin the polishing process, it’s essential to thoroughly clean your countertop with warm soapy water and a soft cloth or sponge. Make sure all dirt, grime, and grease are removed before proceeding.
2. Prepare Your Tools – Depending on which granite polish tools you’re using, you may need to attach them to a power tool or other equipment. Follow the manufacturer’s instructions carefully to ensure safe and effective use.
3. Start With Coarse Grit Pads – If your countertop has deep scratches or wear marks, start with a coarse grit diamond pad (typically 50-100 grit) to remove these imperfections. Work in small sections at a time, using water to lubricate the pad and prevent overheating.
4. Move on to Fine Grit Pads – Once you’ve removed any major imperfections with the coarse grit pad, move on to a finer grit (usually 200-400 grit) to start polishing the surface of your countertop. Again, work in small sections at a time, using water to cool and lubricate the pad.
5. Apply Granite Polish Solution – Once you’ve achieved the desired level of polish with your diamond pads, it’s time to apply a granite polish solution to enhance the shine and color of your countertop. Follow the manufacturer’s instructions carefully, using a soft cloth or applicator brush.
6. Seal Your Countertop – After polishing your granite surface, it’s crucial to seal it with a protective stone sealer. This will help prevent future damage from spills, stains, and scratches. Apply the sealer according to the manufacturer’s instructions and allow it to dry completely before using your countertop again.
Conclusion
As you can see, achieving a perfectly polished granite countertop requires several specialized tools and techniques. By investing in high-quality granite polish tools and following these steps carefully, you can restore your countertop’s natural beauty and protect it from future damage.
Remember that proper maintenance is key to keeping your granite looking like new for years to come. Be sure to clean up spills promptly, avoid using harsh chemicals or abrasive cleaners, and reseal your countertop every few years for maximum protection.
If you’re unsure about which granite polish tools are right for your specific needs or have any questions about the polishing process, don’t hesitate to reach out to a professional contractor or supplier for guidance.
References:
1. “How To Polish Granite & Restore That Factory Shine,” Countertop Guides
2. “Top 7 Best Granite Polishing Kits,” The Breslin
3. “Sealing Granite Countertops: How and Why to Do It,” Bob Vila


