Are you interested in making your own violin? Do you want to know the essential tools that every violin maker needs? Look no further than this comprehensive guide on violin making tools.
In this article, we will cover everything from the basic tools required for beginners to the advanced tools used by professional luthiers. Whether you’re just starting out or looking to upgrade your equipment, we’ve got you covered.
So, without further ado, let’s dive into the world of violin making tools.
Basic Tools for Beginners
If you’re new to violin making, it’s important to start with the basics. Here are some essential tools that every beginner should have:
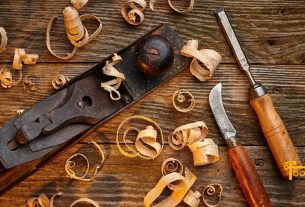
1. Saw – A saw is one of the most basic and important tools for any woodworker. You’ll need a saw to cut various pieces of wood to size.
2. Planer – A planer is used to shave off small amounts of wood at a time, allowing you to create smooth surfaces and precise thicknesses.
3. Chisel – Chisels are used for carving and shaping wood. They come in various sizes and shapes, so make sure you have a set that covers all your needs.
4. Knife – A sharp knife is essential for cutting strings, trimming edges, and other delicate tasks.
5. Ruler – A ruler is necessary for measuring lengths accurately. Make sure you have one that’s long enough to measure the entire length of a violin.
6. Pencil – Marking up your workpiece is an important step in any woodworking project. Make sure you have a pencil that can write on wood.
7. Sandpaper – Sandpaper is used for smoothing out rough surfaces and finishing your project.
8. Glue – You’ll need glue to hold your pieces together while they dry.
Advanced Tools for Professionals
Once you’ve mastered the basics, it’s time to move on to more advanced tools. Here are some tools used by professional luthiers:
1. Thickness Caliper – A thickness caliper is used to measure the thickness of various parts of the violin, such as the top and back plates.
2. Soundpost Setter – The soundpost is an essential part of the violin that helps produce its unique sound. A soundpost setter is used to adjust the position of the soundpost inside the instrument.
3. Purfling Cutter – Purfling is a decorative inlay that’s often found around the edges of a violin. A purfling cutter is used to create precise channels for this inlay.
4. Reamer – A reamer is used to widen holes, such as those for tuning pegs or tailpieces, without causing splintering or damage.
5. Scrapers – Scrapers are used for smoothing out surfaces and removing excess wood.
6. Bow Rehairing Kit – If you’re making violins, chances are you’ll also be repairing bows at some point. A bow rehairing kit will come in handy for replacing bow hair and other maintenance tasks.
7. Varnish Brush – Applying varnish is an important step in finishing your project. Make sure you have a high-quality varnish brush that can apply smooth, even coats.
Tips for Choosing and Using Violin Making Tools
Choosing the right tools can make all the difference when it comes to creating a beautiful, functional violin. Here are some tips to keep in mind when selecting and using your tools:
1. Quality Matters – Invest in high-quality tools that will last a long time and perform well.
2. Keep Them Sharp – Dull tools can be dangerous and won’t produce good results. Make sure you keep your blades sharp.
3. Safety First – Always wear protective gear, such as safety glasses and gloves, when working with power tools or sharp blades.
4. Practice Makes Perfect – Take the time to practice using each tool properly before starting your project.
5. Don’t Rush – Violin making is a slow, careful process. Take your time and don’t rush through any steps.
6. Learn from Others – Joining a violin-making community or taking classes can be a great way to learn from others and get feedback on your work.
Conclusion
Violin making tools are essential for creating a beautiful, functional instrument. Whether you’re just starting out or looking to upgrade your equipment, it’s important to have the right tools for the job.
In this guide, we’ve covered both basic and advanced tools for violin makers, as well as tips for choosing and using them effectively. With these tools and techniques in hand, you’ll be well on your way to creating a stunning violin that sounds as good as it looks.
References
– “Violin Making Tools” Wikipedia, https://en.wikipedia.org/wiki/Violin_making_tools
– “Woodworking Basics: Mastering the Essentials of Craftsmanship” by Peter Korn, https://www.amazon.com/dp/156158620X
– “The Art of Violin Making” by Chris Johnson and Roy Courtnall, https://www.amazon.com/dp/0854297172