As a digital artist, you know that having the right tools is critical to creating stunning artwork. One tool that is essential for any digital artist is the move tool. In this article, we will explore everything you need to know about the Krita move tool, including how to use it and why it’s an essential part of your digital art toolkit.
What is Krita?
Before we dive into the details of the move tool, let’s take a moment to discuss Krita. Krita is a free and open-source digital painting software designed for concept artists, illustrators, matte and texture artists, and the VFX industry. It offers a wide range of features and tools that make it an excellent choice for anyone looking to create stunning digital art.
What is the Krita Move Tool?
The move tool is one of the many tools available in Krita. As its name suggests, it allows you to move objects or layers around your canvas easily. This tool is particularly useful when you want to reposition an element on your canvas or adjust its size or orientation.
How to Use the Krita Move Tool
Using the move tool in Krita is relatively simple. Follow these steps:
Step 1: Open Your Image or Project
To use the move tool, you first need to have an image or project open in Krita. If you don’t have one yet, create a new file or load an existing project.
Step 2: Select the Layer You Want to Move
Next, select the layer you want to move from the Layers panel by clicking on it. You can also select multiple layers if you want to move them together.
Step 3: Activate the Move Tool
Once you’ve selected your layer(s), activate the move tool by clicking on its icon from the toolbar on the left-hand side of your screen. Alternatively, you can use the M key on your keyboard to activate it.
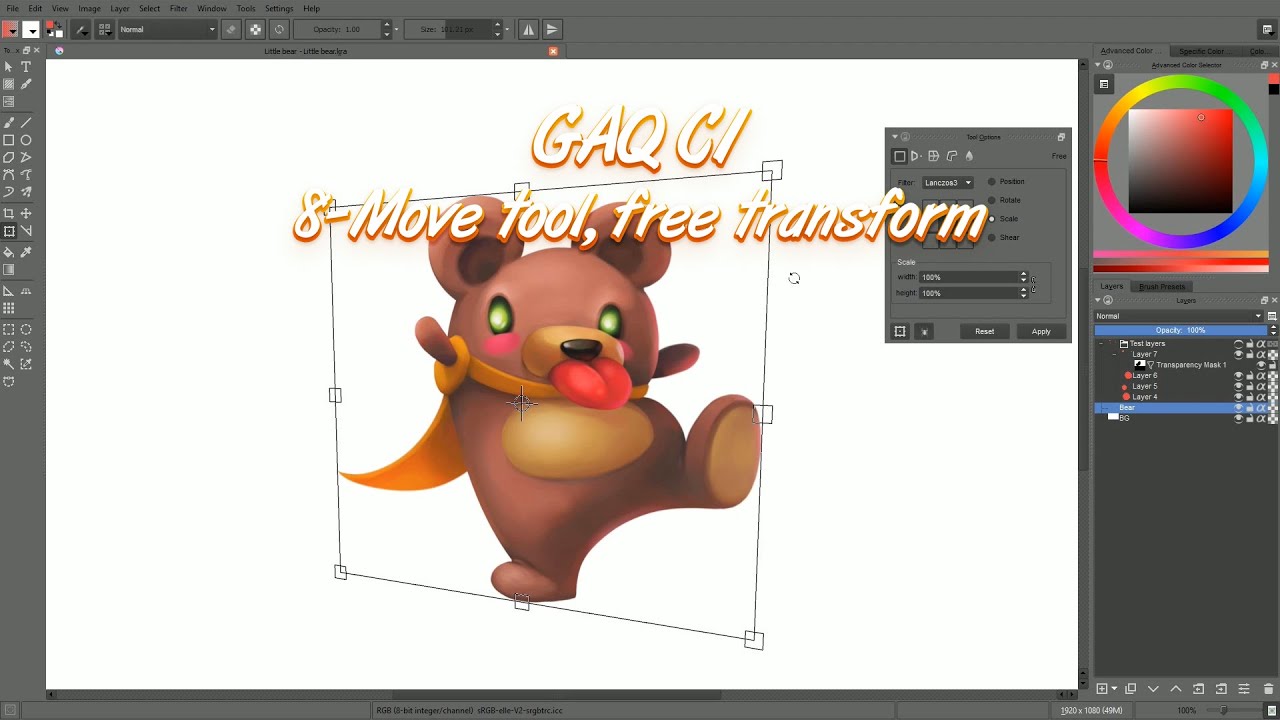
Step 4: Move Your Layer(s)
With the move tool active, click and drag your layer(s) to reposition them on your canvas. You can also use your arrow keys to move them up, down, left, or right in smaller increments.
Step 5: Apply Your Changes
Once you’re happy with your changes, apply them by clicking on the “Apply” button in the tool options bar. If you want to undo your changes, click on “Cancel.”
Why is the Krita Move Tool Important?
The move tool is an essential part of your digital art toolkit for several reasons. Here are just a few:
1. It makes repositioning elements easy: Whether you need to adjust the placement of a character in your artwork or simply move a layer to make room for something else, the move tool makes it easy to do so quickly and efficiently.
2. It allows for precise adjustments: With the ability to move layers using your arrow keys, you can make small, precise adjustments that would be difficult or impossible to achieve manually.
3. It saves time: Instead of having to start over from scratch every time you want to reposition an element on your canvas, the move tool allows you to make quick adjustments and get back to creating in no time.
Tips for Using the Krita Move Tool
While using the move tool in Krita is relatively straightforward, there are a few tips that can help you get the most out of this useful tool:
1. Use Keyboard Shortcuts
As mentioned earlier, you can use the M key on your keyboard to activate the move tool quickly. Additionally, you can hold down the Shift key while dragging an object with the move tool to constrain its movement along either axis.
2. Experiment with Different Modes
In addition to its standard mode, which moves objects around freely on your canvas, the move tool in Krita also offers several other modes. These include Rotate, Scale, Skew, and Perspective. Experiment with these modes to see how they can help you achieve your desired results.
3. Use the Tool Options Bar
The tool options bar at the top of your screen contains various settings that can help you get the most out of the move tool. These include options for adjusting the opacity and blending mode of your layer(s) as well as settings for scaling or rotating objects.
Conclusion
The move tool is an essential part of any digital artist’s toolkit, and the Krita move tool is no exception. By allowing you to quickly and efficiently reposition elements on your canvas, this tool can save you time and help you achieve stunning results in your artwork. So why not give it a try today?
Reference:
– Krita.org. (n.d.). Krita | Digital Painting. Now Free Forever! Retrieved November 16, 2021, from https://krita.org/