Are you looking for a way to add precision and accuracy to your lathe projects? Look no further than the lathe radius tool. This versatile tool can help you create perfectly curved surfaces, angles, and more. In this guide, we’ll cover everything you need to know about the lathe radius tool, from its various types to how to use it properly.
Types of Lathe Radius Tools
There are several types of lathe radius tools available on the market, each with its own unique features and benefits. Let’s take a closer look at some of the most common types:
1. HSS (High-Speed Steel) Radius Cutter
This type of cutter is made from high-speed steel and is typically used for general-purpose turning operations. It’s designed to cut through a wide range of materials, including steel, aluminum, brass, and more.
2. Carbide Tipped Radius Cutter
Carbide-tipped radius cutters are known for their durability and long-lasting performance. They’re made from a combination of carbide and steel, which makes them ideal for heavy-duty cutting applications.
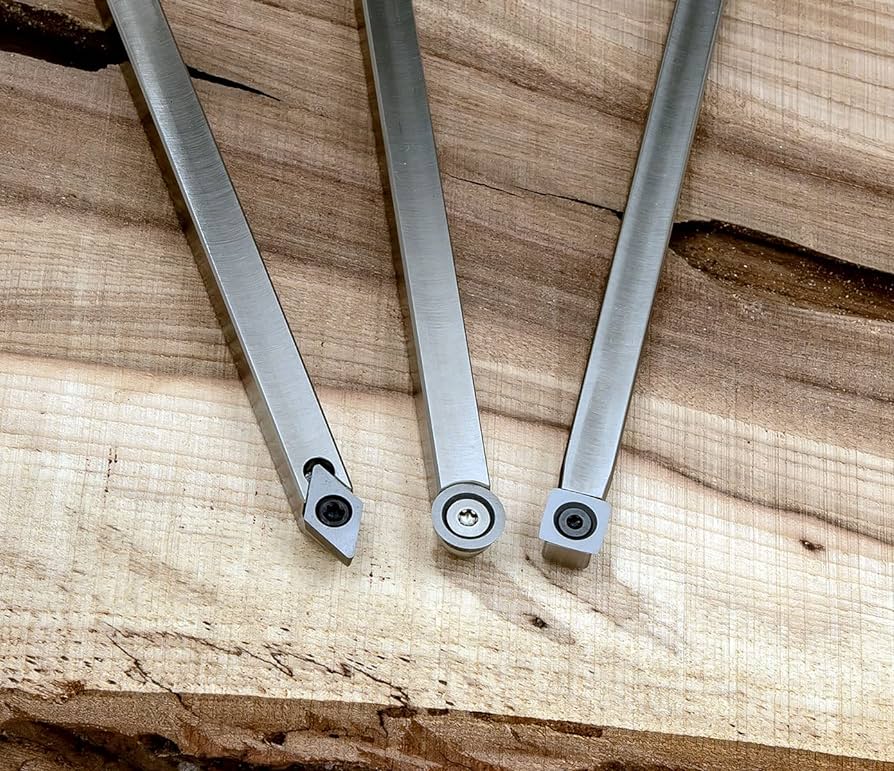
3. Indexable Radius Cutter
Indexable radius cutters feature replaceable carbide inserts that allow you to change the cutting edge without having to replace the entire tool. This makes them a cost-effective option for those who frequently use their lathe radius tool.
How to Use a Lathe Radius Tool
Using a lathe radius tool may seem intimidating at first, but with practice and patience, you can master this valuable tool in no time. Follow these steps to get started:
1. Choose the Right Tool
Before you begin using your lathe radius tool, make sure you’ve selected the right one for your project. Consider the material you’re working with, as well as the desired shape and size of your finished product.
2. Set the Tool Height
Next, you’ll need to adjust the height of your lathe radius tool. This will ensure that the cutting edge is at the correct level for your project. Use a depth gauge or similar tool to measure the distance between the center of the workpiece and the top of your tool.
3. Position the Tool
Once you’ve set the tool height, position it in the lathe’s tool holder. Make sure it’s secured tightly and at the correct angle for your project.
4. Begin Cutting
With your lathe in motion, slowly bring your tool into contact with the workpiece. Start with a light touch and gradually increase pressure as needed. Move the tool along the surface of the workpiece in a smooth, controlled motion.
5. Check Your Progress
Periodically stop to check your progress and make any necessary adjustments to your cutting technique. It’s important to take your time and not rush through this process.
Tips for Using a Lathe Radius Tool
Here are some additional tips to help you get the most out of your lathe radius tool:
– Always wear protective gear, such as safety glasses and gloves, when using power tools.
– Keep your work area clean and organized to prevent accidents.
– Practice on scrap materials before working on your final project.
– Experiment with different cutting angles and techniques to achieve different effects.
– Don’t be afraid to ask for help or advice from more experienced users.
Conclusion
The lathe radius tool is an essential accessory for anyone who wants to create precise and accurate turning projects. Whether you’re a beginner or a seasoned pro, this versatile tool can help you achieve professional-level results. By following these tips and practicing regularly, you’ll be well on your way to mastering this valuable tool.
References:
– https://en.wikipedia.org/wiki/Lathe
– https://www.machinemfg.com/lathe-tools/
– https://www.toolstoday.com/t-wood-turning-tools.aspx