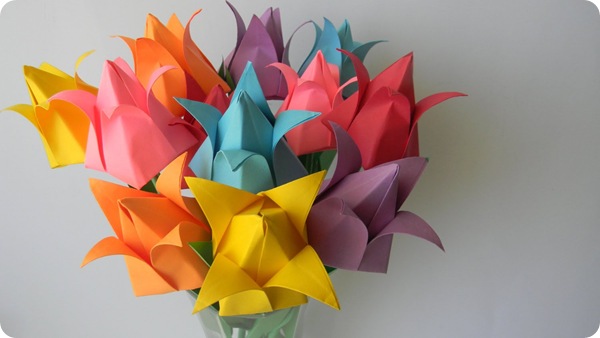
There are dozens of different types of origami flowers—roses, lilies, dahlias, azaleas, and daisies to name a few—and there are variations of each one. The following step by step guide will teach you how to make what is known as the “traditional tulip”. It has a cool inflating effect that makes it really fun, and it’s one of the simplest flowers you can make. To make the traditional tulip, all you need is a single piece of square paper, preferably one that is a tulip-like color: red, yellow, or pink. You may also want to have a piece of green paper handy if you plan to add a stem.
Related articles about How to make paper flowers
Begin what is called the ‘waterbomb base’ by folding the right side of the square across to the other side at the center. Repeat this step horizontally, folding the top edge to the bottom. Turn the paper over, then fold it across from the top right corner diagonally to the lower left corner, then fold the top left corner to the bottom right.

1. A square piece of paper with horizontal, vertical, and diagonal lines across center
Flip the paper to the original side and unfold to the creased square. You should see the right and left side creases pointing inward, and the top and bottom sides doing the same. The key here is to push each of the corners formed by the creases inward so that they meet in the middle. The side-view shape should be a triangle, and this triangle is the waterbomb base.
2. the waterbomb base, completed; may require extra images for the previous folds
Now comes the tricky part. Turn the waterbomb base on its side so you are looking at the formed triangle with the acute corners facing outward. Take the “arm” on the right and fold it inward toward the top, and repeat for the left arm. Turn the waterbomb over and repeat this step on the opposing side. You should see a diamond shape, with the two pair of “petals” pointing upward on either side, as shown.
3. the waterbomb base with the ‘petals’ folded upward
Open the diamond on both sides so that you’re looking at the blank sides, with the petals you just folded facing inward. Fold the far corners of the diamond inward toward the center. The key her is to form a tab and a pocket, where one of the inward folds tucks all the way inside the open part of the other.
4. the tab and the pocket
Now comes the fun part. Locate the small hole that formed at the base of the diamond and blow into it up like a balloon. You should now be able to see the bulbous lower half of the tulip taking shape. All that’s left is to fold the four “petals” you created earlier downward. Now, you can take the green paper and roll it into a “stem”, and then insert it into the same hole you used to fill the balloon. Repeat and make a bouquet!


